
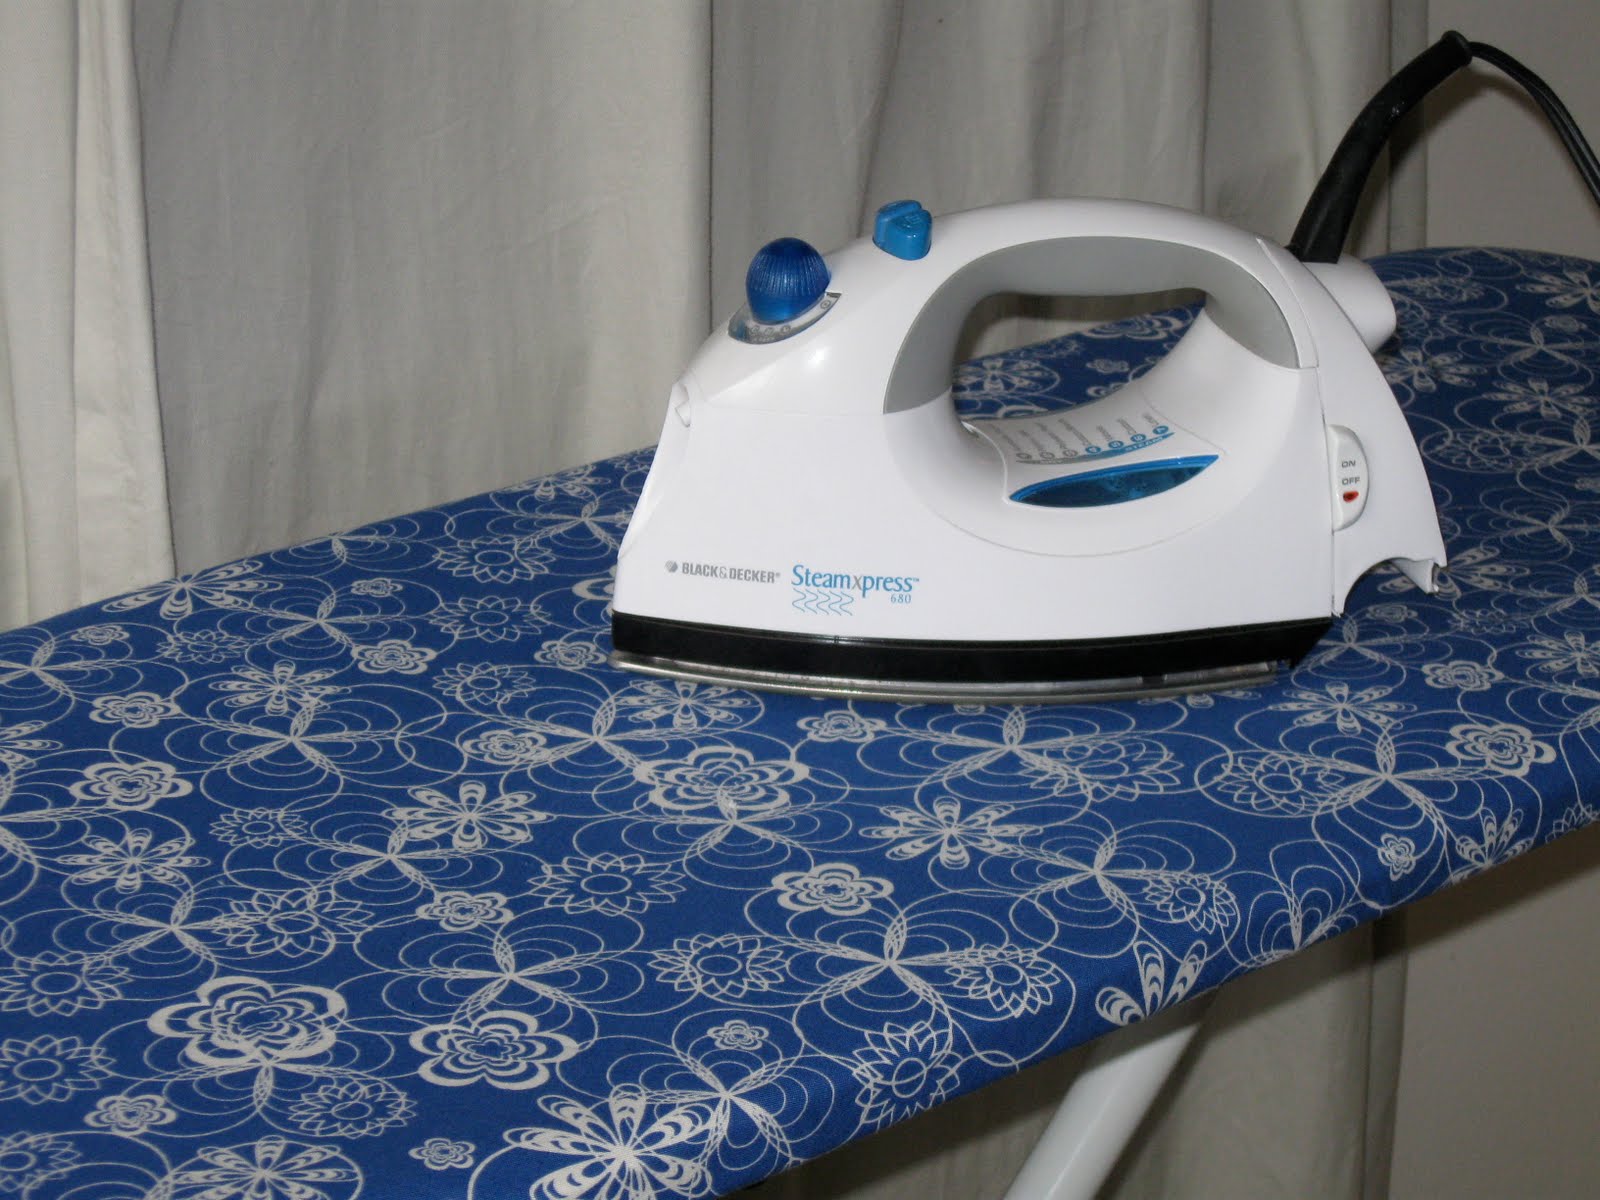
I decided that if I have to stand over the ironing board for an hour or more each week that it ought to be pretty. So I bought some fabric and transformed my stained and very outdated ironing board cover to something pretty. I made sure to get a dark and patterned fabric so future stains would be more disguised.

Grab your JoAnn's coupon and head to the store for some fabric and elastic to make a new ironing board cover for yourself. My whole project only cost $5!
What You'll Need:
Fabric - Everyone's ironing board is a little different in size. Take off your current cover and measure it or take it with you to the fabric store to know how much to get. I just used a simple calico cotton.
Elastic - Cording or 1/4inch elastic - 1 package should be enough. Mine was 2.5 yards and I didn't use it all.
Pins
Safety Pin
Scissors
Thread
Sewing Machine

Step 1: Layout your fabric (pre-shrunk) and lay your old cover on top. Put a few pins in it to keep it in place. (I really wanted this fabric because it was so cheap and the end of the bolt. There wasn't quite enough for me to cut it out straight. There is no need to cut your fabric on a diagonal like I did!)


Step 2: Measure and mark 1-1.5 inches (depending on your elastic width) all the way around your old cover. This extra fabric will become the casing for your elastic.

Step 3: Cut the fabric on the marks you made.

Step 4: Fold the edge of the fabric in 1/2 inch (or half of the measurement you used in step 2). Pin in place.

Be sure to mark one area about 3 inches where you will not sew it closed. I marked my area with 2 crossed pins.

Step 5: Sew the hem down about 1/8 inch from the edge. I used a straight stitch, but would have used a zigzag very close to the raw edge if my sewing machine would have been working correctly. Don't sew it completely shut - you need that 3 inch space to put the elastic through!


Step 6: Pin down one end of your elastic ends at the opening.

Step 7: Put a safety pin through the free end of the elastic. Push the pin and elastic through the opening and all around the edge of your cover.

Step 8: Once the two elastic ends meet, pin them together and try the cover on your ironing board. This will be the time that you decide how tight to make your elastic. You will want to make it very snug as you don't want any bunching while you are ironing your clothes.
Once you have decided how tight to make the elastic tie it in a knot or sew the ends securely together.

Step 9: Tuck the elastic back in the edge and sew the hole closed.

Step 10: Put your finished cover on your ironing board and you are done!! I left my old pad and cover underneath for a little extra cushion. Don't use your old cover if it has an rips or tears in it.
Now you have a beautiful board to do your ironing on. It definitely makes me happy to be staring at this instead of the old one I had on before!

I am no expert seamstress (as I'm sure you can tell), but this project is rather forgiving since your seams are all hidden underneath. Please ask questions if you have any! Have fun!
Great timing for me to discover this post. I just bought an ironing board at a thrift store yesterday and knew I'd be throwing out the old yucky-looking cover and making a new one. Trouble is I had no idea where to start. Thanks for the great tutorial!
ReplyDeleteIt turned out great. What a good way to match your ironing board to your decor! I'd love it if you'd stop by my Topsy Turvy Tuesday Link party and add this cute tutorial!
ReplyDeletegreat tutorial! love how it turned out...come on over and link up to MMM :)
ReplyDeleteLooks great~if my ironing board looked that nice I might not mind ironing!
ReplyDeleteI'm not much of a seamstress but because of your simple tutorial I may give this a whirl. I always see fun covers for the larger boards but mine is one of those ones that comes out of the wall and those covers are harder to find. I will be bookmarking this. Thanks for posting. Visiting via Sumo's Sweet Stuff.
ReplyDeletePam
THANK YOU! Our ironing board cover finally just bit the dust, and I knew I *could* make one, but needed some baby steps. This is fabulous!
ReplyDelete~Alison
http://oopsey-daisy.blogspot.com/
Oh how I love to change out my ironing board cover!! Yours looks really fabulous! Great fabric selection!
ReplyDeleteI can totally relate - my husband just informed me the dress code is changing at work... ironing here I come! I'll need some happy fabric to cheer me up!
ReplyDeleteThanks for coming by my party. Now If only I could FIND my ironing board (in storage)
ReplyDeleteI know what you mean about more ironing. My husband just started teaching and he wants to wear a shirt and tie to each class....so that means me standing at the ironing board more often. I could really use a new cover, my existing one doesn't stay on very well. I think I will be using some fabric from my stach and creating a new, much prettier one! Thanks for sharing!!
ReplyDeleteI second the perfect timing! My husband just went from roofing to sales, so I've gone from gojo and a scrub brush (to get the tar out) to iron and spray starch.
ReplyDeleteI love the new cover! I just might have to make a new one for myself. The one I have now is getting gross.
ReplyDeleteThanks for linking to Transform Tuesday!!
I love the fabric you chose! Great tutorial.
ReplyDeleteWhat a great idea! Thanks for the tutorial and for linking up to Hoo's got talent!
ReplyDeleteI should do this too. In fact, I have the same ironing board cover as your old one and it is absolutely revolting.
ReplyDeleteHey - I just realized I've got some sheets that I was going to get rid of or use.
I know what I am going to use one for!!
Perfect timing on this one! I need a new cheerful cover.
ReplyDeleteI think I am going Make this. What a cute idea.
ReplyDeleteWow! What a super tutorial! I've kind of been looking for a sewing project that doesn't seem too scary, and I think this is it!
ReplyDeleteI think that zooping up my ironing board, will go a long way to making the chore more fun! I recently found a new 'iron-water' scent at a local British store (I live in South Africa) and even THAT made the world of difference in me enjoying doing the ironing. I think a new ironing board cover will be a totally fun project!
Great idea to match with decor, one those things you ask yourself,"why didn't I think of this!" You did a great job on your pictorial. Thank you.
ReplyDelete